
 By admin@handinhandadventures.com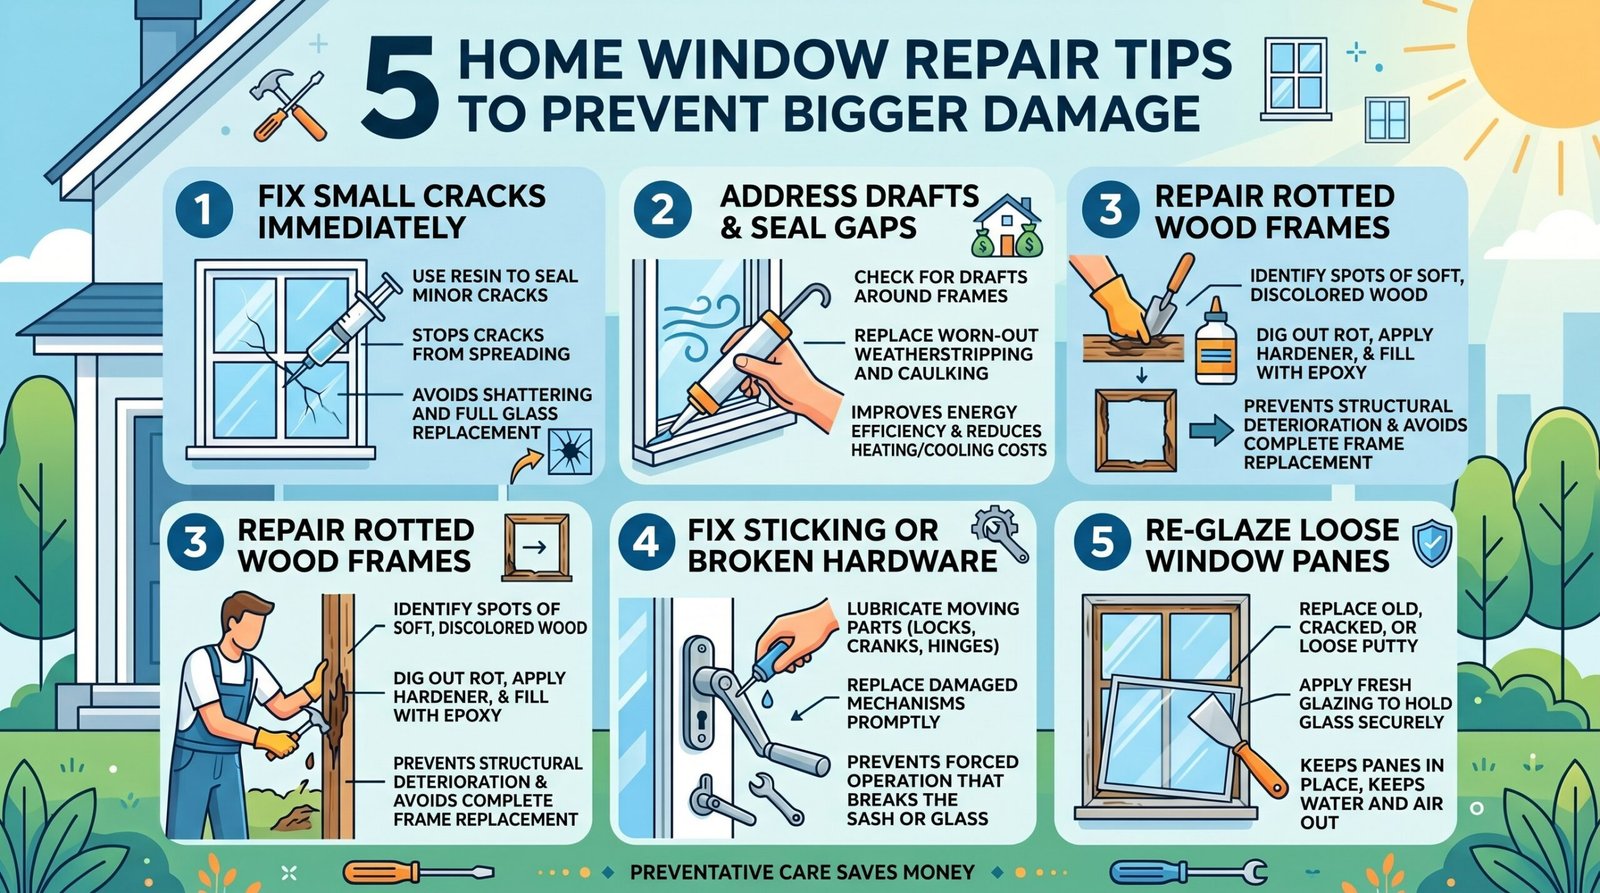
1. Protective Gloves
When dealing with broken glass, the first thing you should grab isn’t a broom, but a good pair of gloves. Seriously, don’t even think about touching any shards without them. Your hands are your primary tools for most repairs, and cuts from broken window panes can be nasty and deep.
I learned this the hard way after a hailstorm decided my living room window was a target. I figured I’d just sweep up the pieces, but a tiny sliver went right into my palm. It wasn’t a huge cut, but it throbbed for days and made everything I did with that hand a pain. Plus, you never know what kind of gunk might be mixed in with the glass.
Here’s what you should look for:
- Heavy-duty leather work gloves: These are great for general protection against sharp edges. They offer a good balance of dexterity and toughness.
- Thick rubber gloves: If you’re dealing with a lot of tiny fragments or potential chemical residue (less common, but possible), these can offer a good barrier.
- Cut-resistant gloves: Designed to prevent cuts, often made from materials like Kevlar. They might feel a bit bulky, but for serious breakage, they’re worth considering.
Don’t just grab any old gardening gloves. You need something substantial that can handle sharp edges without tearing. Think about the kind of gloves you’d wear for handling rough materials or doing heavy-duty yard work. It might seem like overkill, but trust me, a few minutes spent putting on the right gloves saves you days of pain and the risk of infection.
2. Eye Protection
When you’re dealing with broken glass, whether it’s a small crack or a full shatter, your eyes are definitely at risk. Tiny shards can fly off in unexpected directions, and even seemingly stable glass can break further when you’re trying to fix it. Always wear safety glasses or goggles whenever you’re near a damaged window.
It’s not just about the big pieces; it’s the microscopic fragments that can cause serious injury. Think of it like this: even a small chip of glass getting into your eye can lead to irritation, infection, or worse. So, before you even think about touching the window, put on some proper eye protection. Regular eyeglasses or sunglasses won’t cut it – you need something that seals around your eyes to prevent debris from getting in.
Here’s why it’s so important:
- Flying Debris: Glass can break outwards or inwards, sending sharp fragments flying.
- Invisible Shards: Microscopic glass dust can become airborne during repair.
- Unexpected Breaks: Even a small tap can cause a cracked pane to shatter further.
Don’t underestimate the danger. A moment of carelessness can lead to a lifetime of vision problems. It’s a simple step that makes a huge difference in keeping you safe while you tackle home window repairs.
3. Clear Epoxy
Okay, so you’ve got a small crack or maybe a tiny hole in your window. It’s not bad enough to warrant a full replacement right away, but you don’t want it getting worse, right? This is where clear epoxy can sometimes be a temporary lifesaver.
For very small chips, smaller than a dime, clear epoxy or even clear nail polish can actually seal up the spot and stop moisture from getting in. It’s not going to fix the structural integrity of the glass, mind you. Glass cracks spread because of stress inside the material, and just slapping some glue on the surface won’t stop that. But for those super minor imperfections, it can buy you some time.
Here’s the deal with using it:
- Clean the area first. You need to get rid of any dirt, dust, or old sealant. A little rubbing alcohol on a clean cloth usually does the trick. Make sure it’s totally dry before you apply anything.
- Apply sparingly. You don’t need a lot. Just a tiny bit of clear epoxy applied directly into the chip or crack is enough. Use a toothpick or a fine-tipped applicator if you have one.
- Let it cure completely. Follow the instructions on the epoxy packaging. Rushing this step means it won’t harden properly and won’t do its job.
Remember, this is strictly a temporary fix. It’s meant to keep the weather out and prevent that tiny chip from turning into a big spiderweb crack while you wait for a proper repair or replacement. Don’t expect it to restore insulation or hold up to major stress.
4. Silicone Spray
Sometimes, you’ve got a small crack or a tiny hole in your window, and you just need to keep the weather out for a bit. While it won’t fix the glass itself, a good quality clear silicone spray can be surprisingly helpful for sealing up minor issues. Think of it as a temporary bandage for your window.
This stuff is great for sealing small gaps and preventing drafts. It’s especially useful if you have a double-pane window and only the outer glass is damaged. The silicone spray can help keep moisture from getting into the space between the panes, which can cause fogging later on.
Here’s how you might use it:
- Clean the area: Make sure the glass around the crack or hole is totally clean and dry. Use a glass cleaner and a paper towel, then let it air dry completely.
- Apply the spray: Hold the can a few inches away and spray a thin, even coat directly over the damaged spot. You might need to do a couple of passes, letting it dry a bit in between.
- Seal the edges: For small holes, you can also use clear packing tape over the crack first, then use the silicone spray to seal the edges of the tape. This adds an extra layer of protection.
Remember, this is a temporary fix. It’s not going to make your window strong again or restore its insulation. It’s just meant to buy you some time, maybe a day or two, until you can get a proper repair done. Don’t expect it to hold up against a major storm or last for months.
5. Weatherstripping
Okay, so you’ve got a draft coming from your windows, or maybe you noticed some wear and tear on the seals. This is where weatherstripping comes in. It’s basically like a little gasket that goes around your window frame to keep the outside air out and the inside air in. Think of it as a simple way to stop those annoying drafts and keep your home more comfortable, which can also help with your energy bills. It’s a pretty straightforward fix, and honestly, it makes a big difference.
When you’re looking at weatherstripping, you’ll see a few different types. The most common ones are:
- V-strip or tension seal: This is usually a metal or plastic strip that folds in the middle, forming a ‘V’ shape. It’s great for sliding windows and doors because it compresses when you close them.
- Felt: This is a more budget-friendly option, often used in older windows. It’s not as durable as other types, but it can work in a pinch.
- Rubber or vinyl: These are probably the most popular. They come in various shapes, like tubular, flat, or fin-seal. They’re flexible and create a good seal against the frame.
- Foam: This is a self-adhesive strip that’s super easy to apply. Just peel and stick. It’s good for less-used windows or temporary fixes, but it can compress over time and lose its sealing power.
Replacing worn-out weatherstripping is a small step that can prevent bigger issues like water damage and drafts, potentially saving you from needing a full Las Vegas window replacement down the line. Before you buy anything, take a good look at your current weatherstripping. Is it cracked, brittle, or just missing in spots? Measure the gaps you need to fill. You want something that fits snugly without making it hard to open or close the window.
Applying new weatherstripping is a bit like giving your windows a cozy hug. You want it to be snug, but not so tight that it strains anything. Clean the frame really well before you stick anything on – dirt and old gunk will make it fall off way too fast. Press it down firmly all along the edges where the window meets the frame. If you’re using the peel-and-stick kind, take your time and make sure it’s straight. A little extra effort here means a lot less hassle later on with drafts and energy loss.
For really old or damaged frames where weatherstripping alone might not cut it, you might need to consider other temporary fixes before looking into professional help. But for most situations, fresh weatherstripping is a solid DIY job that keeps your home sealed up tight.
Frequently Asked Questions
What’s the most important safety gear when fixing windows?
Always wear thick gloves to protect your hands from sharp glass edges. Also, put on safety glasses to keep your eyes safe from flying debris. It’s like wearing a helmet and pads for sports – they protect you from getting hurt.
Can I fix a small crack in my window myself?
For tiny cracks, sometimes you can use a special clear epoxy made for glass. You clean the area, carefully put the epoxy on, and smooth it out. It’s a good temporary fix, but if the crack is big or the glass is weak, it’s better to call a pro.
My window feels drafty. What can I do?
Drafts usually mean there are small gaps. You can often fix this by putting in new weatherstripping around the window frame. Sometimes, adding or fixing caulk around the outside of the window helps too. It’s like sealing up holes in a jacket to keep the cold out.
What causes foggy windows (moisture between the panes)?
When you see fog or moisture stuck between the two panes of glass in a double-pane window, it means the seal has broken. This lets air and moisture sneak in. While there are temporary fixes, this usually means the glass unit needs to be replaced for good insulation.
When should I stop trying to fix a window and call a professional?
If the glass is shattered into many pieces, if the frame is rotting or badly damaged, or if the window is on a high floor, it’s time to call an expert. Also, if a window is really hard to open or close, or if you’re just not comfortable doing the repair, a professional can handle it safely.
How can I temporarily cover a broken window?
To cover a broken window temporarily, you can use thick plastic sheeting and secure it with strong tape, or use a piece of plywood cut to size and screwed into the frame. This keeps the weather out and helps secure your home until you can get a proper repair.