
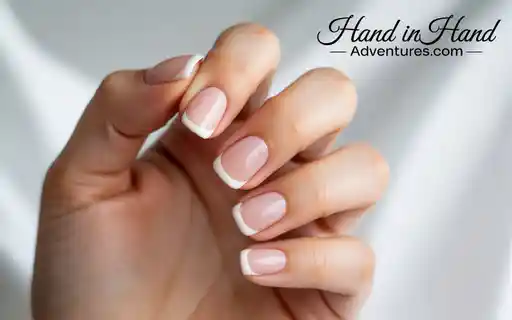
French tip nails have long been a classic choice for those seeking an elegant and timeless look. This iconic manicure adds a touch of sophistication to any style, making it perfect for both casual outings and formal events. But who says you need to book an appointment at the salon to rock this chic design? With a little creativity and some essential tools, you can achieve stunning French tip nails right from the comfort of your home.
Imagine saving time and money while flaunting polished nails that rival professional results. Whether you’re preparing for a special occasion or simply treating yourself, mastering DIY French tips is easier than you might think. Get ready to unleash your inner nail artist as we guide you through simple techniques that will elevate your manicure game!
Benefits of Doing Your Own French Tip Nails at Home
Doing your own French tip nails at home offers a sense of empowerment. You can tailor the design to fit your style perfectly.
Cost-effectiveness is another significant advantage. Salon visits can add up quickly, especially if you maintain regular appointments. DIY not only saves money but also gives you control over the quality of materials used.
Time is often in short supply, yet creating beautiful nails doesn’t have to consume hours. With practice, you can achieve stunning results in less time than it takes to drive to a salon.
Flexibility is key when it comes to home manicures. Feel free to experiment with different colors and designs without feeling pressured by salon schedules or costs.
Most importantly, there’s joy in creativity! Every stroke becomes an expression of who you are—making each manicure uniquely yours.
Necessary Tools and Materials for DIY French Tips
To create stunning DIY French tip nails, having the right tools is essential. Start with a good quality base coat. This will protect your natural nails and provide a smooth canvas for polish.
Next, grab some nail polish in both nude or pink shades and classic white for the tips. Choose colors that complement your skin tone for the best effect.
You’ll also need a reliable top coat to seal everything in place and add shine. Look for one that dries quickly for convenience.
Don’t forget about precision! A fine-tipped brush or nail art pen can help create crisp lines on your tips. Alternatively, use painter’s tape or adhesive stencils if you’re not confident freehanding it.
Keep cotton pads and nail polish remover handy for clean-up after mistakes—because perfection takes practice!
Step-by-Step Guide to Achieving Salon-Quality Results
Start with clean, dry nails. Gently push back your cuticles and remove any old polish.
Next, apply a base coat to protect your natural nails. This step is crucial for longevity.
Once the base coat dries, choose a classic nude or soft pink polish. Apply one or two thin layers for an even finish.
Let that layer dry completely before moving on to the tips. Use white nail polish or a specialized French tip pen for precision.
Tilt your finger slightly as you paint the tips, starting from one side and sweeping across to the other in one smooth motion.
After achieving the desired width of your tips, let them dry fully. Finish off with a top coat to seal everything in place and add shine.
This simple process will give you beautiful results without ever stepping foot into a salon.
Tips and Tricks for Perfecting Your DIY French Tips
To achieve flawless French tip nails, precision is key. Start with a steady hand and the right angle when applying polish.
Use scotch tape or nail strips to create clean lines. Place them at an angle for perfect tips without the mess.
When painting your white tips, use thin layers. This allows for even coverage and helps avoid clumping.
Don’t rush through drying times; patience pays off here. A quick-dry topcoat can seal in your design while preventing smudges.
If you make a mistake, don’t fret! A small brush dipped in acetone works wonders for corrections.
Practice makes perfect. Experiment with different shapes and lengths until you find what suits you best. Your DIY French tips will look salon-fresh in no time!
Alternative Designs and Colors for a Modern Twist on the Classic Look
If you’re looking to refresh the classic French tip nails, explore playful alternatives that make a statement. Consider using vibrant colors for your tips, like electric blue or fiery red. This adds a bold contrast against neutral bases.
Another fun twist is the ombre effect. Gradually transition from a soft pink base to white tips or even pastel gradients. It’s subtle yet trendy.
Geometric shapes can also elevate your nail game. Instead of traditional straight lines, try angled tips or triangle designs for an edgier vibe.
Metallic finishes are perfect for those who want some sparkle. Gold or silver tips on nude polish offer glam without being overwhelming.
Don’t shy away from incorporating glitter too! A touch of shimmer at the tip creates a festive feel that’s ideal for special occasions or nights out.
Achieve Beautiful and Budget-Friendly Nails with DIY French Tips
Achieving beautiful and budget-friendly nails at home is entirely possible with DIY French tips. By following the simple techniques outlined, you can create stunning results that rival those of a salon visit. With just a few essential tools and some practice, your fingertips can look polished and chic without breaking the bank.
Embrace your creativity by experimenting with colors or alternative designs to put your own twist on this classic manicure. Whether you prefer traditional white tips or vibrant hues, there’s no limit to what you can achieve.
So gather your materials, roll up your sleeves, and enjoy the process of pampering yourself with flawless French tip nails right from the comfort of home. Your hands will thank you for it!